39 how to use excel to create mailing labels
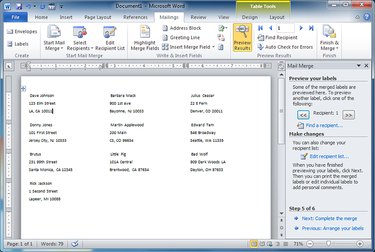
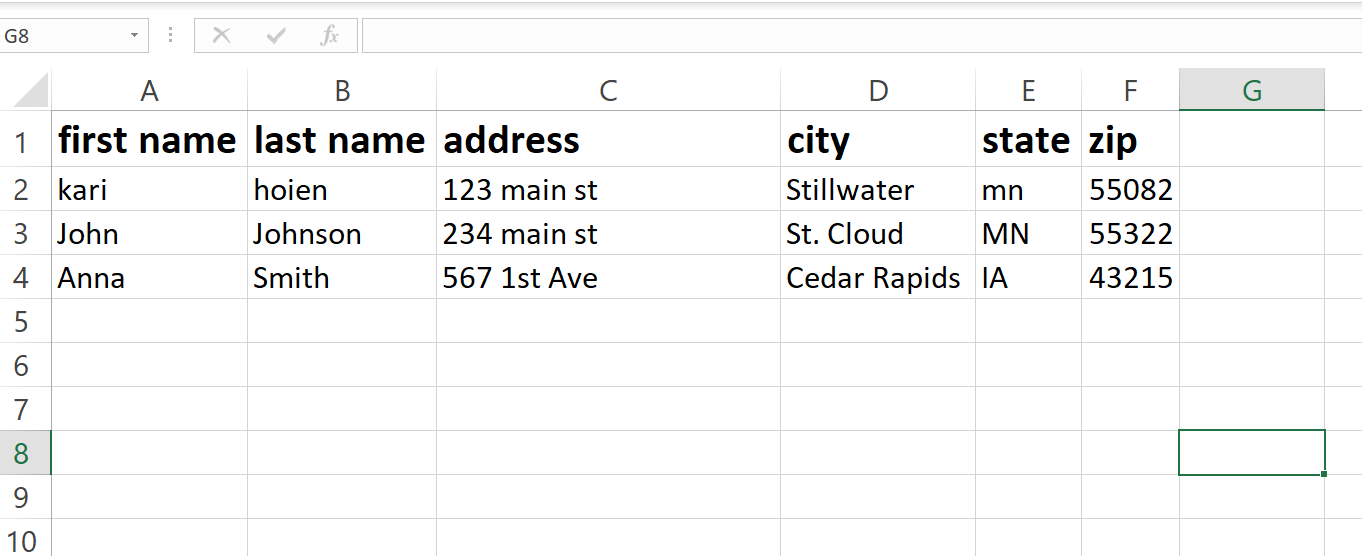
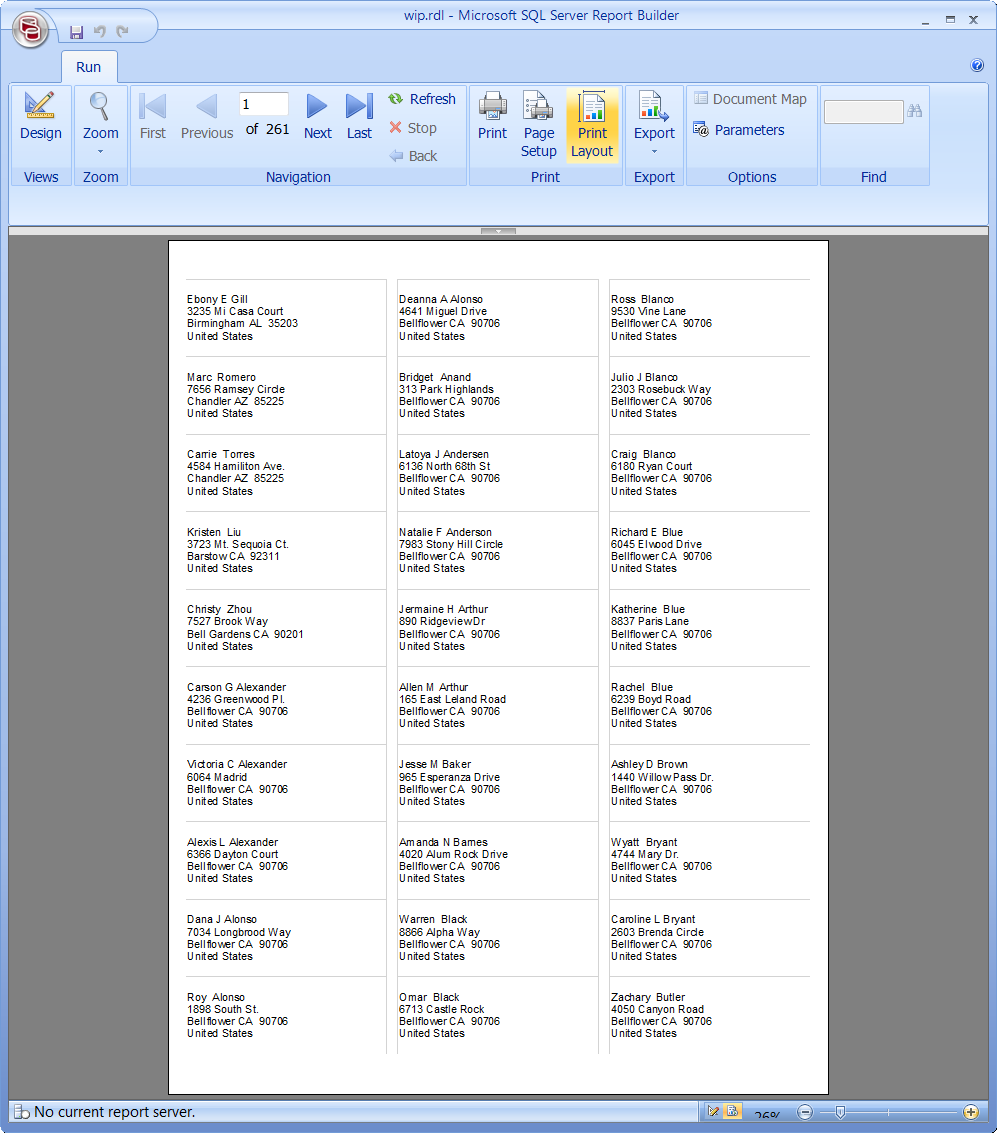
Easy Steps to Create Word Mailing Labels from an Excel List In the Mailings ribbon, choose Select Recipients...Use an Existing List (this is where we will locate the Excel file). Use the dialog box to browse to the Excel file and select it and click Open. In the next dialog box, select the sheet in Excel that contains the list. Once your list has been selected, your Word screen will look like this. Create and print mailing labels for an address list in Excel To create and print the mailing labels, you must first prepare the worksheet data in Excel, and then use Word to configure, organize, review, and print the mailing labels. Here are some tips to prepare your data for a mail merge. Make sure: Column names in your spreadsheet match the field names you want to insert in your labels.
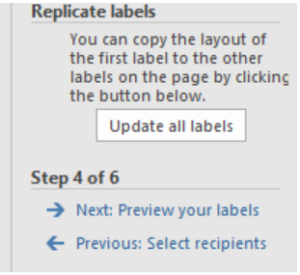
How to Print Labels From Excel - EDUCBA Step #3 - Set up Labels in a Blank Word Document In a blank word document, Go to > Mailings, select > Start Mail Merge, select > Labels. A new pane called Label Options will open up. Under that, select Label vendors as Avery US Letter, Product number as 5160 Address Labels. Then, click OK. See the screenshot below.
How to use excel to create mailing labels
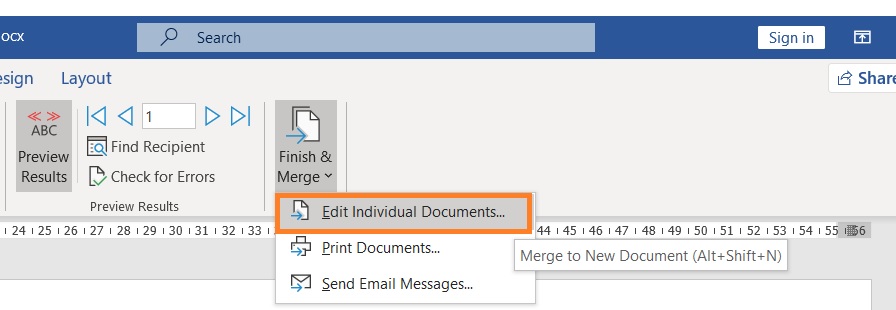
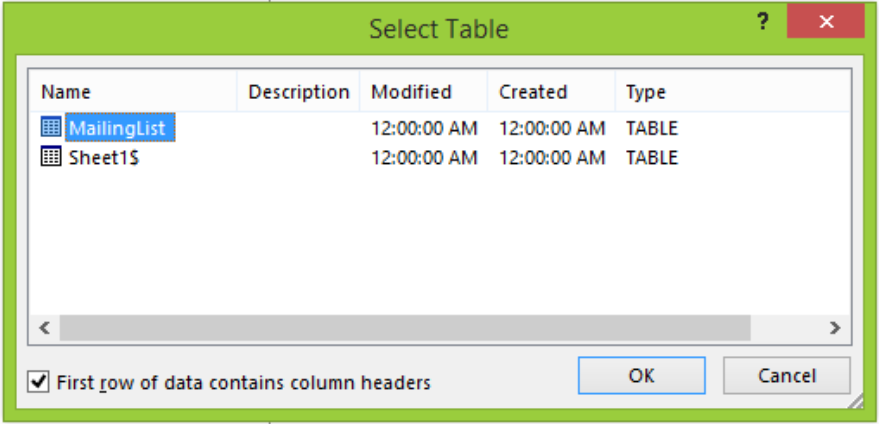
How To Print Mailing Labels From Excel [Address List Example] Then, create a new blank document. On the new document, click 'Mailings' from the tab list. Click the 'Start Mail Merge' icon and select 'Labels…'. A window titled 'Label Options' will open. On the 'Label vendors', select 'Avery US Letter'. On the 'Product number', select '5160 Address Labels'. Press 'OK'. Video: Create labels with a mail merge in Word Click Browse, select your Excel mailing list, and then click Open. Make sure the First row of data contains column headers box is selected and click OK. Check your list. Drag the bottom right corner to make the dialog box bigger. Then click OK. Click Next: Arrange your labels. To add the address block, click Address block and click OK. How to Create Mailing Labels from Excel? - Best Excel Tutorial Using Mail Merge Once in a new Word document, select the Mailings tab, then select Start Mail Merge > Labels. You'll then be able to choose one of many standard label styles and sizes, and Word will automatically create the labels in the selected style for you. To import the data, click Select Recipients > Use Existing List.
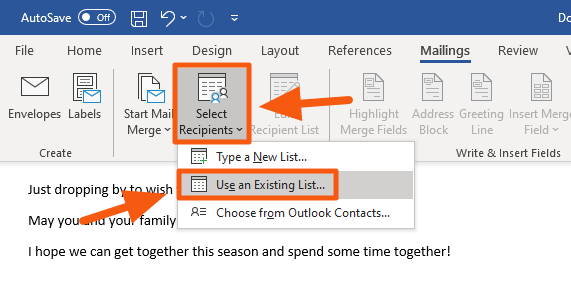
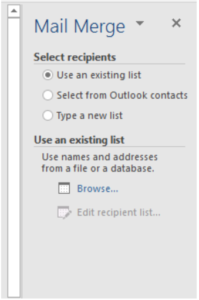
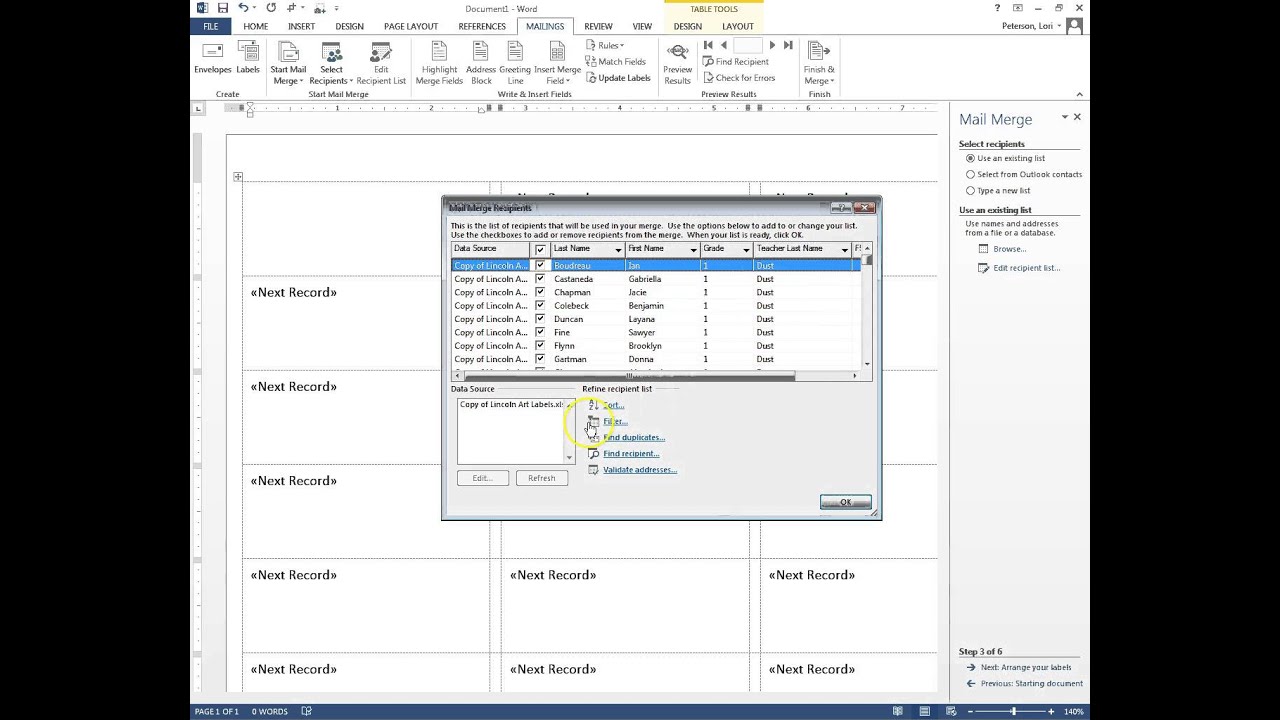
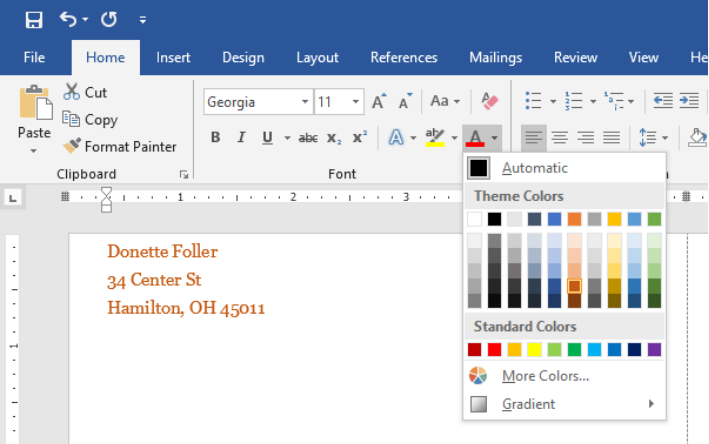
How to use excel to create mailing labels. Create and print labels - support.microsoft.com Create and print a page of identical labels Go to Mailings > Labels. Select Options and choose a label vendor and product to use. Select OK. If you don't see your product number, select New Label and configure a custom label. Type an address or other information in the Address box (text only). Mail merge using an Excel spreadsheet - support.microsoft.com Choose Edit Recipient List. In Mail Merge Recipients, clear the check box next to the name of any person who you don't want to receive your mailing. Note: You also can sort or filter the list to make it easier to find names and addresses. For more info, see Sort the data for a mail merge or Filter the data for a mail merge. Insert a merge field How To: Create Mailing Labels Using Excel and Word On your menu bar at the top select "Select Recipients" and then chose "Use Existing List". Navigate and select the Excel file you saved from Part One above. The pop up screen that displays next - just select "OK" Your document should now show "Next Record" in all labels (except for the first one) How to Create Mailing Labels from Excel? - Best Excel Tutorial Using Mail Merge Once in a new Word document, select the Mailings tab, then select Start Mail Merge > Labels. You'll then be able to choose one of many standard label styles and sizes, and Word will automatically create the labels in the selected style for you. To import the data, click Select Recipients > Use Existing List.
Video: Create labels with a mail merge in Word Click Browse, select your Excel mailing list, and then click Open. Make sure the First row of data contains column headers box is selected and click OK. Check your list. Drag the bottom right corner to make the dialog box bigger. Then click OK. Click Next: Arrange your labels. To add the address block, click Address block and click OK. How To Print Mailing Labels From Excel [Address List Example] Then, create a new blank document. On the new document, click 'Mailings' from the tab list. Click the 'Start Mail Merge' icon and select 'Labels…'. A window titled 'Label Options' will open. On the 'Label vendors', select 'Avery US Letter'. On the 'Product number', select '5160 Address Labels'. Press 'OK'.
How to Make Address Labels Using an Excel Spreadsheet | Techwalla
How to Create Mailing Labels in Excel | Excelchat
Car Buying Comparison Spreadsheet with regard to Car Cost Comparison Spreadsheet Vehicle ...
Easy Steps to Create Word Mailing Labels from an Excel List

Printing mailing labels using excel | Download them or print
How to Mail Merge Using an Excel Spreadsheet and Word

Generating Mailing Labels from the Excel Download : Gabriel Software, LLC
How to Create Mailing Labels in Excel | Excelchat
How to Create Mailing Labels in Excel | Excelchat
How to use mail merge to create bulk labels from Excel spreadsheet – MR-LABEL
How to print labels the EASY way! – Video Tip | HelpMeRick.com - Computer help for beginners

Mail Merge for Dummies: Creating Address Labels using Word and Excel 2010 | Mail merge, Address ...

🥇 Create Labels in Excel Step by Step Guide 2020
How to Create Mailing Labels in Excel | Excelchat
How to create mailing labels with an Excel merge - YouTube
How to Create Mailing Labels in Excel | Excelchat

Avery 8660 Template | Avery Template 8660 » Template Haven

Create Mailing Labels From Excel - Top Label Maker
Post a Comment for "39 how to use excel to create mailing labels"